My interest in various graphics effects has been with me for a long time, but last year I really started to delve deep into more challenging techniques. The following are some of my proudest works. (All has been done in a custom game engine)
Something that got interesting for me while working on Through The Veil was shadows. I hated the hard edge of our previous shadows and started reading about soft shadows. Also throughout the development of Diabotical Rogue I broaden my shadow expertise, developing cascaded shadow maps.
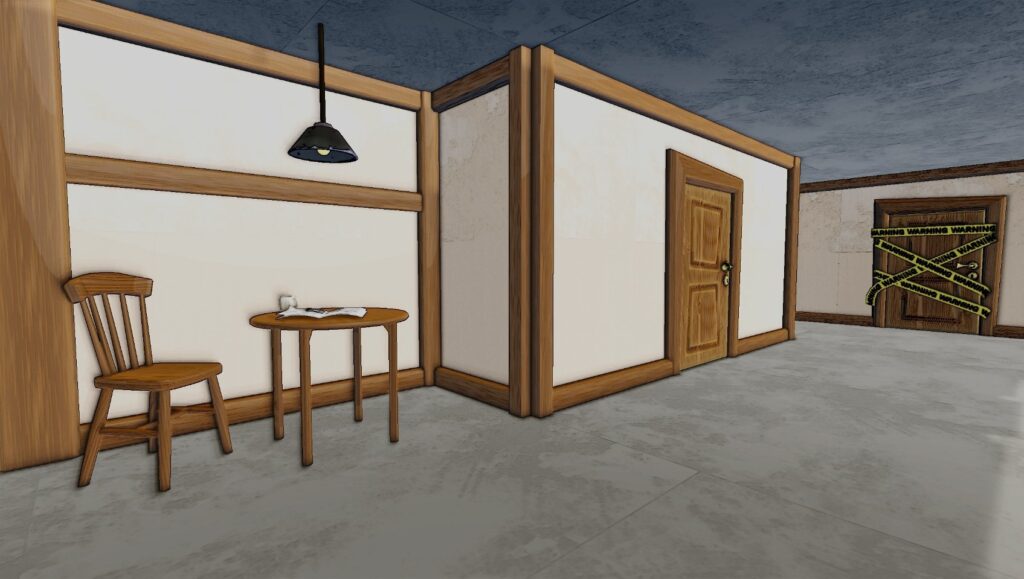
Soft shadows using PCF Filtering
Directional, Point, and Spot Lights
Enhanced visual fidelity with Jitter Sampling
Shadow Cascades
Directional Light
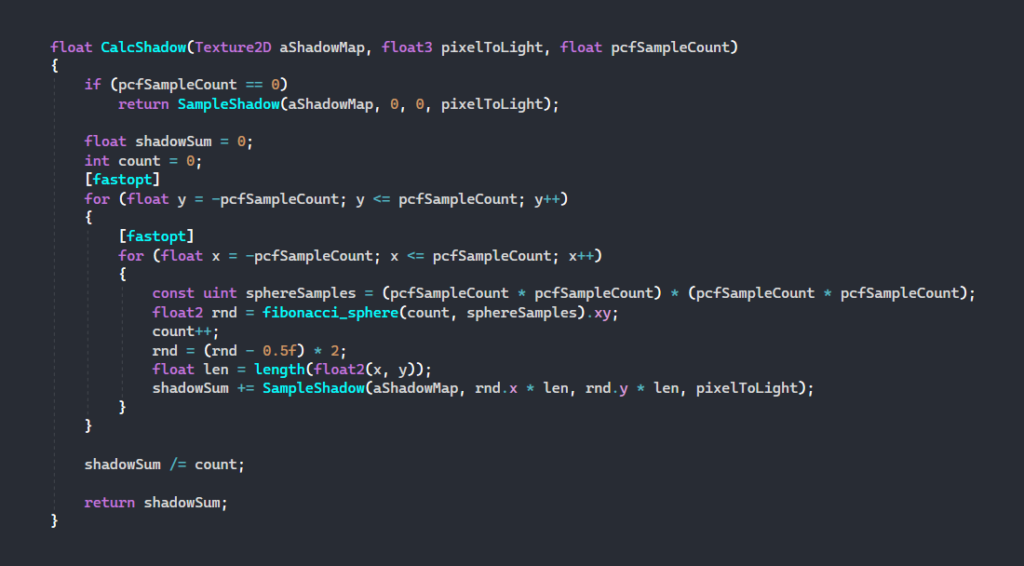
First I started out with the basics and implemented shadow casting for the directional light. I wasn’t really satisfied with the results so I started looking into soft shadow techniques and stumbled upon a PCF Filtering paper from Nvidia.
The biggest problem I encountered during the making of the soft shadows was getting the correctly mapped texels around the sampling area. Once this was done I moved on to the other light types
Spot & Point Lights
The spotlights were not that hard to implement, I just needed a way to use my camera system better to change around the FoV and push the corresponding ViewProjection matrix to the GPU.
As for the point lights, it was a bit trickier. Now I had to work with 6 shadow maps and it was taking up a lot of memory. I started developing a way to pack the textures in a cube map and sample from that but I didn’t have enough time to explore that area.
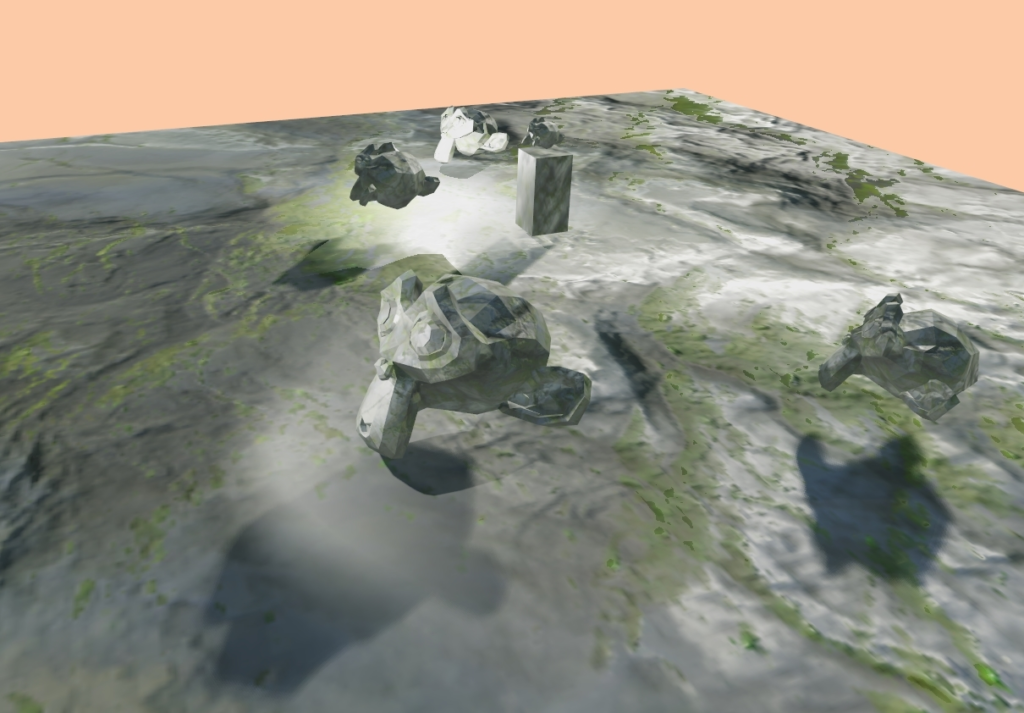
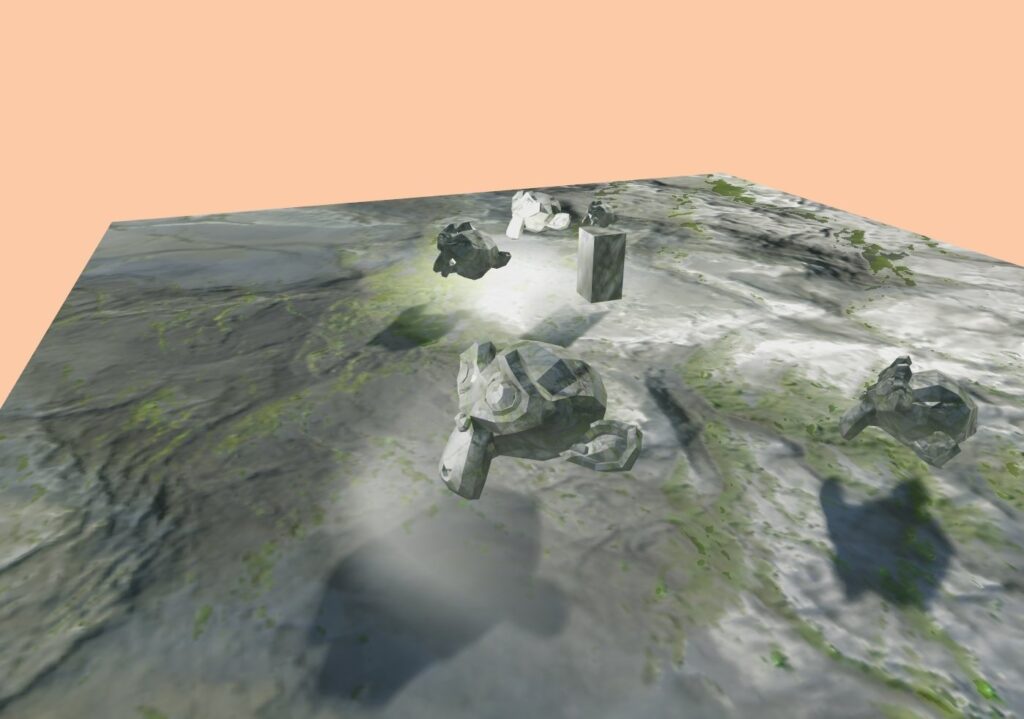
Only Spotlight shadows. Take notice under the monkey in front.
Only Pointlight shadows. Take notice of the bright spot left of the box.
Jitter Sampling
Once all the types were done I was really happy with the results but after a while of staring at the edges, I realized the same pattern was repeated which caused some disturbing-looking shadows. I started looking for a solution to this and found a method where one sample at random distributions around a pixel to get a more realistic solution.
CSM in Diabotical Rogue
The cascade shadow mapping process involves 3 main steps:
First, Split the camera’s frustum into partitions for each cascade, defining the range of each.
Second, For each cascade, calculate the frustum’s corner points in world space and use them to generate an AABB from the light’s perspective.
Finally, Map the AABB to the light’s projection matrix, ensuring each cascade has an optimal resolution based on its depth range.
Fixing Shadow Shimmering
Cascades often suffer from shadow shimmering (dancing) due to:
Texel misalignment—shadow map texels fall between screen pixels.
Non-uniform frustum resizing—rectangular frustums cause inconsistent texel scaling.
Our solution did aswell. To fix this, cascades are snapped to texel alignment and kept square to ensure stable, flicker-free shadows.
Optimizations, Customization & Debugging
To achieve the visual quality we wanted, we needed to balance self-occlusion and peter-panning. Our goal was to reduce self-shadowing artifacts on distant objects without introducing excessive peter-panning up close. At the same time, we aimed to retain the performance benefits typically seen with non-cascaded shadow maps.
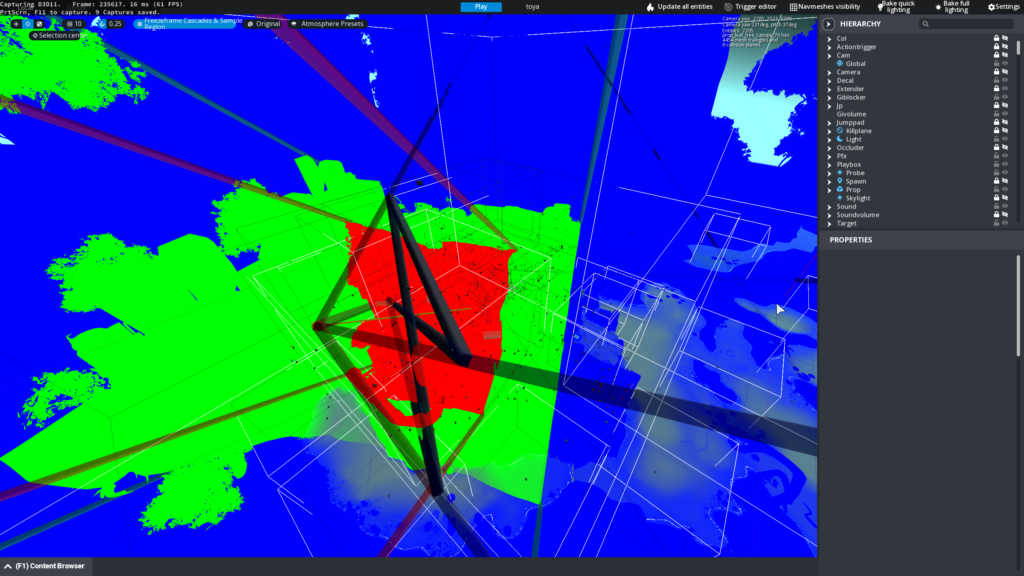
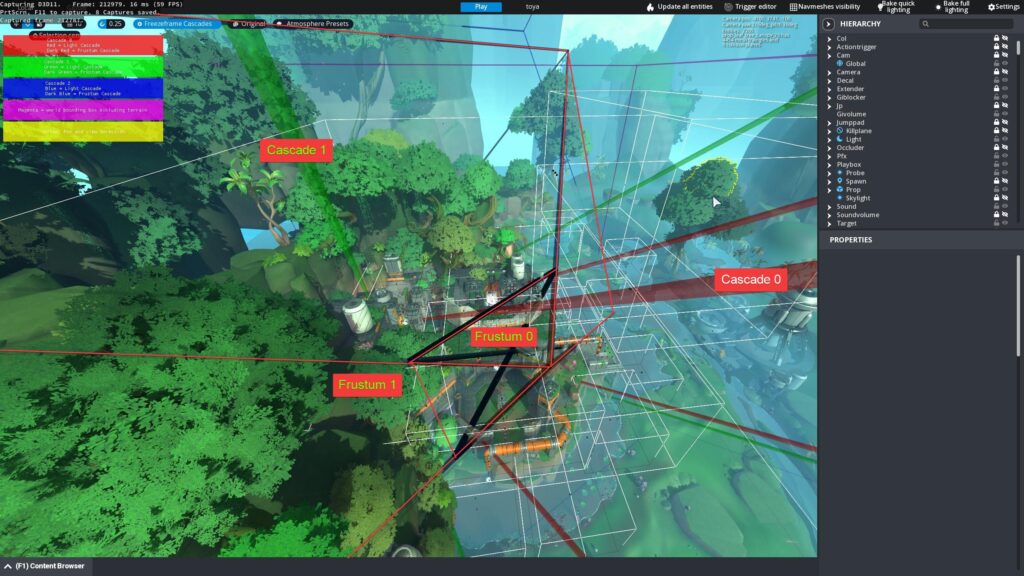
For debugging, each cascade is visualized with a unique color. You can capture a snapshot from your current camera position, storing the cascades and their corresponding frustums for later inspection. This allows you to move around the scene and easily identify artifacts or transitions.
We also support multiple rendering modes to aid in debugging and development—such as viewing only the cascade splits, cascade splits with sampling, or cascades with full shadow rendering.
Further Development
Static shadow baking which would integrate baked lighting (e.g., lightmaps) into the shadow pipeline to offload distant or static geometry from real-time computation.
Hybrid shadow system to use baked shadows for distant cascades, while keeping real-time CSM for closer objects. This balances visual quality and performance.
Variance Shadow Maps (VSM) to store both depth and depth squared to support soft shadow filtering via Gaussian blur, offering an alternative to the expensive PCF.
Screen Space Effects.
I became interested in screen space solutions early on in my projects, focusing mainly on post-processing techniques. I love how these effects can enhance the overall visual appeal of an image with minimal resources. Here are some examples of my proudest work.
While working on the game project Through The Veil, we encountered issues with just using outlines to get the toon-like sketch look. As we were aiming for thick outlines and the default outlines were not sufficient, we began implementing SSAO.
I randomly generated kernels and a 4×4 normal texture on the CPU to use in my SSAO solution. I then added depth buffer retrieval to obtain world position data. I sorted out transforming the kernel buffer to tangent space and calculating the amount of occlusion each pixel had. Finally, I optimized the performance of my SSAO solution by incorporating compute shaders.
Outlines
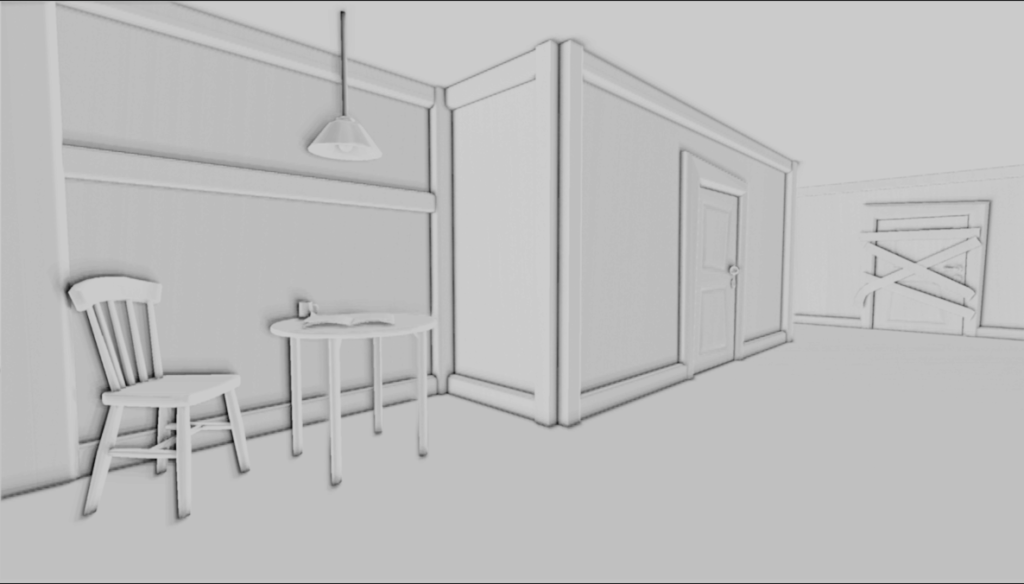
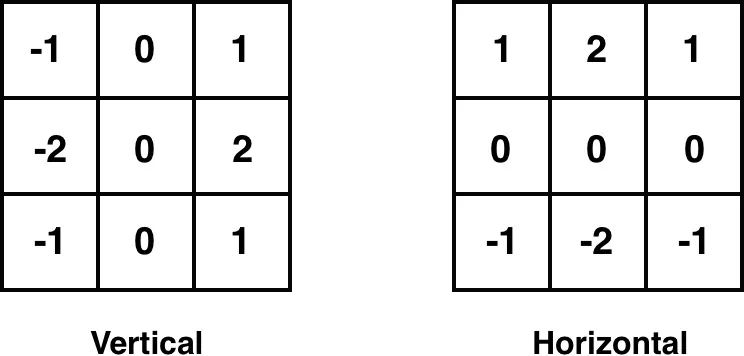
My vision with outlines in Mime Scape, was that normal object upscaling would not suffice for our project. We wanted to have outlines on both the silhouettes of the object but also on details inside the object itself. I looked around for techniques and found Sobel Operatorwhich I implemented on the albedo GBuffer pass and later on incorporated into the Computed pipeline.
The Sobel Operator is a type of 2D derivative mask that efficiently detects edges in an image. It is frequently utilized in combination with AI for edge recognition in image filters for various applications. In essence, the Sobel Operator examines neighboring texels and multiplies them by a scalar to obtain the most accurate average sum of all 3×3 texels.
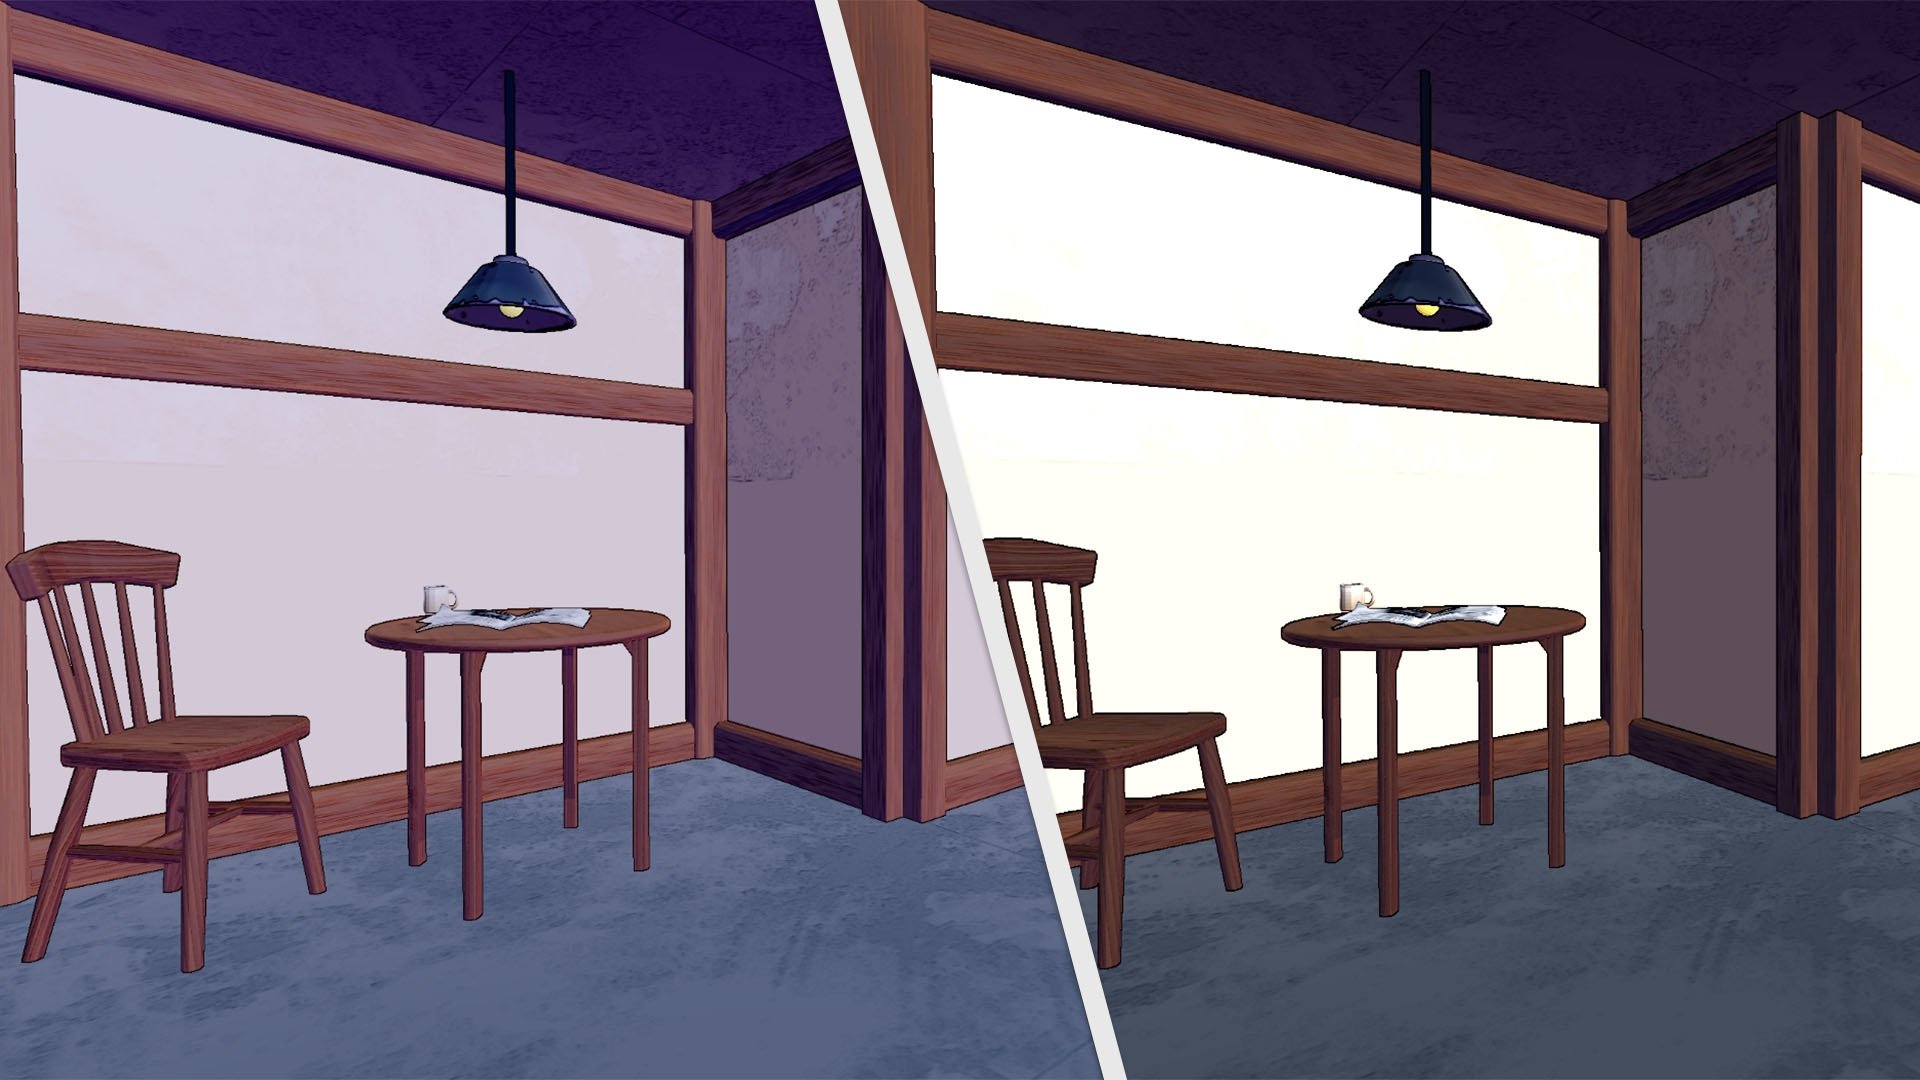
Post Processing
During my involvement in various projects, I have significantly expanded the post-processing pipeline. For instance, the bloom effect used in the engine was inspired by the paper presented in CoD Advanced Warfare. Furthermore, while working on Mime Scape, we had the opportunity to receive valuable insights from a game development studio on proper color correction techniques utilizing AGX technology. I researched and subsequently integrated AGX into our development process.
Modular Rendering.
As we transitioned to the project Mime Scape, our team made significant improvements by refactoring the codebase for a better architectural structure. Additionally, we aimed to enhance the user experience by developing a basic editor with easy navigation capabilities.
To achieve this, we decided to incorporate both a viewport and a game view, which required us to develop a modular rendering.
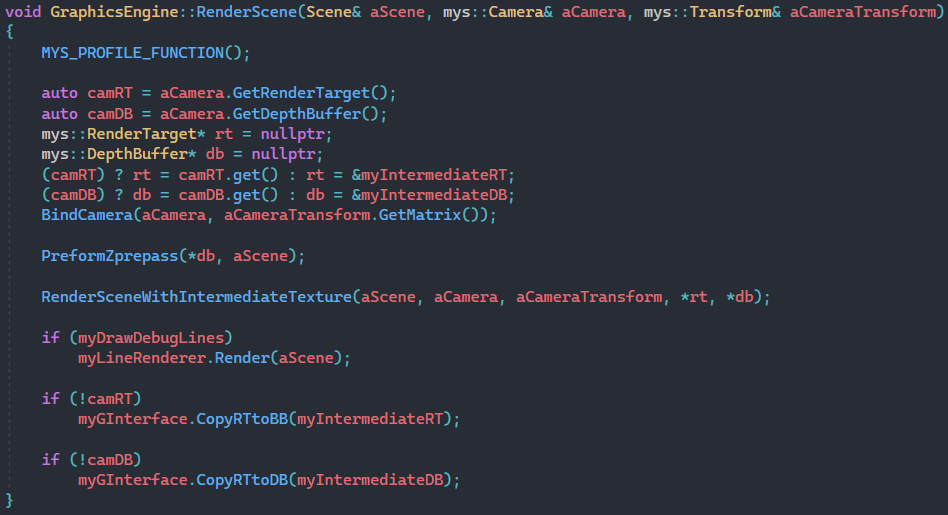
Working with the framework is straightforward, as the rendering call only requires a scene and camera as input parameters. If the camera has a render target already created, it will render to that texture. However, if a render target is not present, it will write to an intermediate target and then copy the output to the back buffer. This approach became necessary as the Launcher project of the game did not require any additional viewport or game view cameras.
The following solution was inspired by the easy-to-use Render Texture in Unity, as I created the functionality for each camera to have its own textures. Applying the texture to a material is just as easy as applying an albedo texture.
After the scene is rendered to the camera, retrieving the texture resource is very simple. You can then apply it to other materials or an ImGui 2D texture as desired. By doing this, we can also determine whether a camera wants to receive post-processing, shadows, and UI.
Future Work.
Although I have gained a great deal of knowledge from exploring various graphics techniques. I am eager to continue pushing the boundaries of what is possible. Specifically, I am excited to integrate different screen space effects such as Screen Space Reflections and Volumetric Lights into the engine, as I believe they will add a new level of realism and depth to the visual experience.